
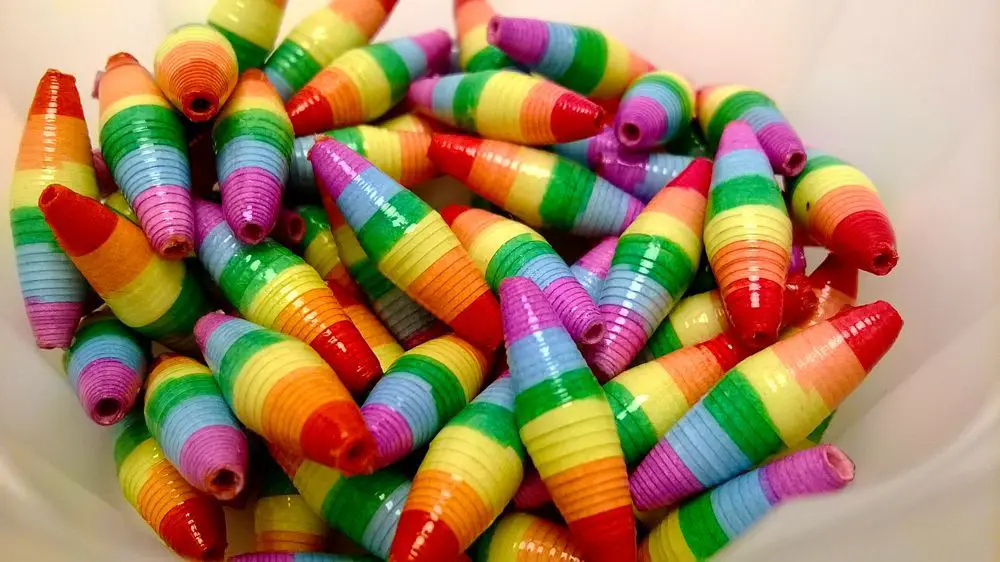
🎨 DIY Paper Beads: Create Unique Jewelry with Creative Recycling (and Quilling!)
If you love crafting and are looking for an affordable and eco-friendly way to bring personalized jewelry to life, DIY paper beads are the perfect solution! These little wonders are not only beautiful but are also a fantastic example of creative recycling.
Discover how to make them, whether to enrich an existing quilling necklace or to create a completely new and colorful piece of jewelry.
💎 Why Should You Make Paper Beads?
There are at least three great reasons to dedicate yourself to this project:
- Creative Recycling: You can use old magazines, advertising flyers, unusable book pages, or simple colored sheets and turn them into something precious.
- Customization: Unlike plastic or glass beads, with paper, you can control every aspect: color, pattern, and size, creating a design that perfectly matches your style or a specific project, such as a quilling necklace.
- Ease of Making: The process is surprisingly simple and does not require expensive tools.
✂️ Supplies Needed: Everything You Will Need
Here is the list of tools and materials necessary for your paper beads:
- Paper: Choose your source!
- To embellish a quilling necklace: Single-color paper or paper that closely matches the colors of your quilling project.
- For a new, colorful necklace: Vibrant flyers/brochures, glossy magazines, or gift wrapping paper.
- Scissors or Craft Knife: For cutting the paper strips.
- Ruler and Pencil: For marking the measurements.
- Toothpicks (or Thin Skewer): The tool for rolling the paper.
- PVA Glue (White Glue): To secure the end of the bead.
- Clear Varnish (Glossy or Matte): Essential for sealing and making the beads more resistant and shiny.
📝 Step-by-Step: How to Make Your Own Paper Beads
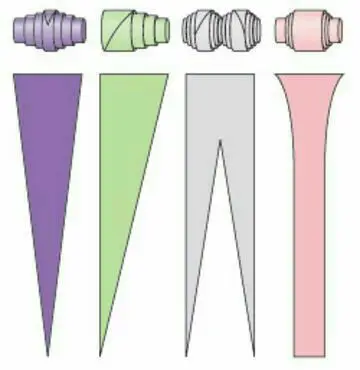
The secret to well-made beads lies in the precise cutting of the paper. Follow these steps:
1. Preparing the Paper Strips
To get a tapered and round shape, you need to cut the paper into the shape of a long, narrow triangle (or a very narrow isosceles triangle).
- Measure: Decide the height of your finished bead. This will be the short side of the triangle (the base). For example, 1 cm (0.4 in).
- Trace: On the back of the sheet, draw a straight line and mark the chosen measurement at regular intervals (e.g., every 1 cm).
- Cut: Draw a diagonal line that starts from the corner of one mark (e.g., 1 cm) and reaches the center of the next mark. Repeat the drawing along the entire sheet. The final result will be a series of long triangles.
💡 Tip: The longer and narrower the triangle, the thicker and larger the finished bead will be. For small beads, reduce the length.
2. The Rolling Process
This is the most fun part!
- Insert the wider base of the triangle into the slot of a toothpick (or skewer).
- Begin to roll the paper tightly and evenly, keeping the paper centered on the skewer.
- Continue rolling until you reach the narrow point of the triangle.
- Apply a small amount of PVA glue to the tip and secure it to the bead. Gently slide the bead off.
3. Sealing and Finishing (The Professional Touch)
Paper beads are delicate, so sealing is crucial, especially if you plan to use them for a DIY necklace that will be worn often.
- String the finished beads onto a skewer or thin wire.
- Brush generously with the clear varnish. A water-based varnish is ideal; it dries quickly and won’t yellow.
- Allow to dry completely. For extra durability, you can apply a second or third coat of varnish.
🌟 Your Paper Beads for the Quilling Necklace
Paper beads are the perfect addition to a quilling project.
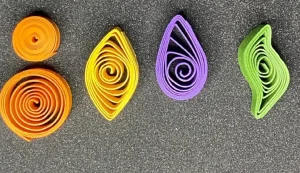
- Embellishment: If you have a quilling necklace (or earrings) where the rolled paper shapes are too far apart, use beads made from the same color paper to fill the gaps and give a sense of greater fullness.
- Clasps and Details: Use them to create a more professional finish near the necklace clasp or as spacers between the quilling shapes.
Start experimenting right away and transform “paper waste” into a precious and unique piece of jewelry! Your next fashion accessory awaits, and it will be 100% handmade and sustainable.
If you enjoyed this creative recycling project, let us know in the comments! Would you like a tutorial on how to make the base of the quilling necklace?
test comment no log
ok
Comment car 01