🌸 Introduction to Quilling: 5 Essential Basic Shapes for Beginners
Quilling, also known as paper filigree, is a fascinating art form that transforms simple strips of paper into magnificent three-dimensional creations. While it may look complex, the magic lies in mastering just a few simple basic quilling shapes.
If you are just starting out, this article is your essential guide to learning the foundations of this quilling technique. Once you’ve mastered these shapes, you’ll be ready to create your own paper masterpieces!
🛠️ The Essentials: Basic Quilling Tools
Before we dive into the shapes, let’s make sure you have the right supplies for your beginner quilling journey:
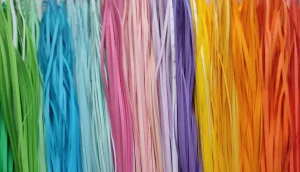
- Quilling Paper Strips: Pre-cut strips (usually 3mm or 5mm).
- Slotted Tool: The primary tool used to coil the paper.
- Craft Glue (White Glue): Preferably with a fine-tip applicator.
- Circle Sizing Guide: A template used to ensure consistent coil sizes.
🌀 The Foundation: Learning the Loose Coil
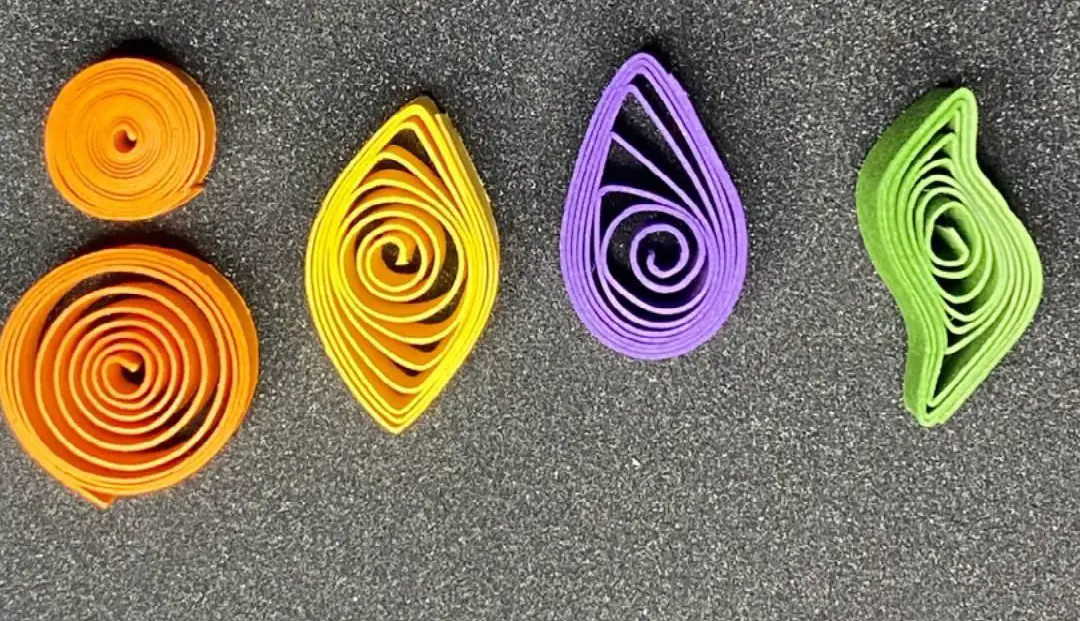
Every basic quilling shape starts with a rolled circle of paper, called a coil. The most important form is the Loose Coil, because it serves as the base for almost every other figure.
How to Roll a Loose Coil:
- Take a strip of quilling paper in your chosen color.
- Insert the end into the slotted tool and roll it steadily.
- The Key Step: Remove the coil from the tool and let it “loose”—allow it to expand naturally on your work surface.
- To get perfectly identical loose coils for your project, let them expand inside a circle sizing guide.
- Apply a tiny dot of glue to the end to secure the shape.
✨ 5 Essential Basic Quilling Shapes
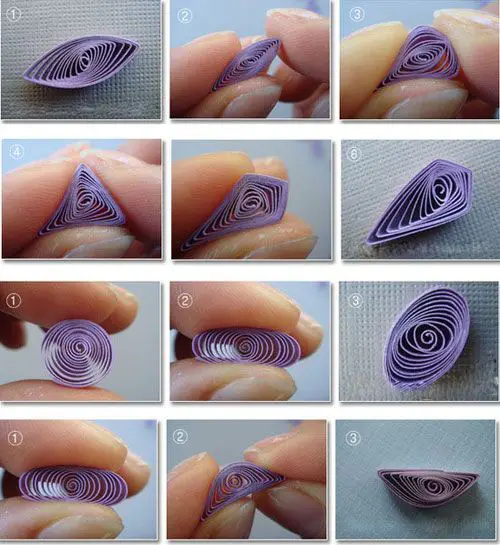
Once you’ve mastered the Loose Coil, it’s time to pinch and mold it into the primary figures. This is the heart of all paper filigree techniques.
| Shape | Description | How to Mold from a Loose Coil |
| 1. Teardrop | A classic drop shape. Perfect for flower petals and leaves. | Pinch the coil on one side only. |
| 2. Eye / Marquise | An elongated, oval shape. Ideal for longer leaves. | Pinch the coil on two opposite sides simultaneously. |
| 3. Slug / Sharp Marquise | Similar to the Eye but thinner and pointier. | Squeeze and stretch the two pinched ends of an “Eye” shape. |
| 4. Square | A geometric shape. Useful for borders or tiles. | Start with an “Eye” shape, then pinch the other two sides. |
| 5. Triangle | Great for animal ears or decorative sharp details. | Start with a “Teardrop” and flatten the curved side to form a base. |
💡 Expert Tips for Paper Filigree Success
- Patience is Key: Focus and patience are essential for a clean result. Don’t rush the rolling process!
- Glue is the “Enemy”: Glue is necessary to seal your work, but be careful. Too much will warp the paper; too little and it won’t hold. Use a toothpick to apply microscopic dots.
- The Sizing Guide is Essential: A circle sizing guide (or circle ruler) is vital for creating uniform shapes. Without it, your final design will look disproportionate.
👉 Next Steps in Your Quilling Journey
Now that you know the basic quilling shapes, you are ready for your first project! If you are a beginner, my advice is to start with a simple flower before moving on to complex 3D figures.
What will you create first with your new quilling skills? Let me know in the comments!