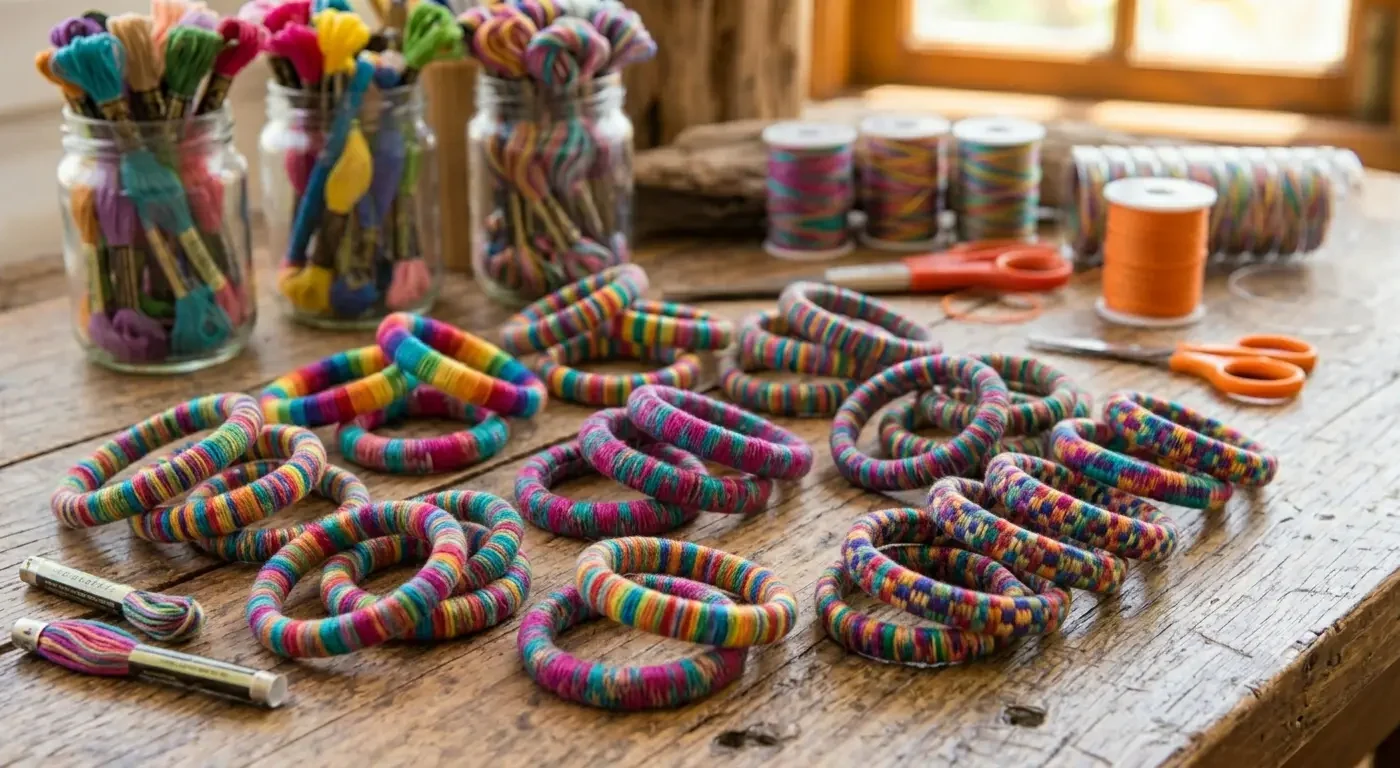
How to make bracelets with a plastic bottle and yarn
Have you ever looked at a simple plastic bottle and wondered how you could reuse it instead of throwing it away? Creative upcycling is the perfect way to give new life to everyday items and transform them into trendy, unique, and eco-friendly accessories.
In this step-by-step tutorial, you will discover how to make beautiful handmade woven bracelets—perfect for the summer or as gifts for your friends!
Supplies: what you need
Before starting, make sure you have all the necessary materials at hand:
- 1 Clear plastic bottle (preferably with a smooth center part)
- Colored yarns or threads (embroidery floss, yarn, or cotton cord)
- Craft knife/cutter (and sharp scissors)
- Adhesive tape (optional, for finishing the edges)
- Hot glue or fabric glue
Step-by-Step Tutorial
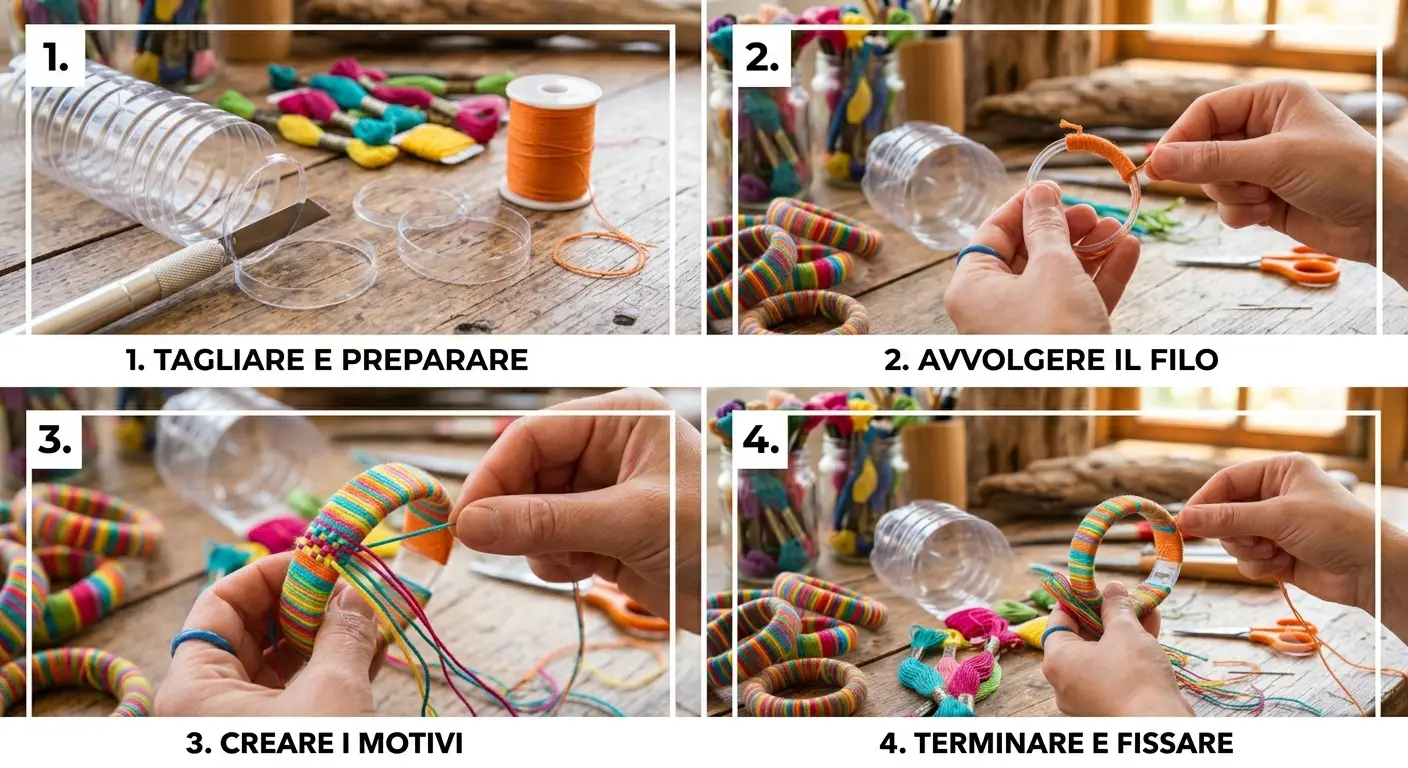
1. Cut and Prepare the Base
Using a craft knife or scissors, cut rings from the plastic bottle to your preferred width (about 0.5 to 0.75 inches / 1.5 – 2 cm for a classic bracelet).
Bonus Tip: To prevent the sharp plastic edges from scratching your skin, you can pass them quickly near a gentle heat source (like an iron protected by parchment paper) or wrap them with a layer of thin adhesive tape.
2. Wrap the Thread
Choose your base color and secure the end of the thread inside the plastic ring with a small knot or a drop of glue. Start wrapping the thread around the ring, keeping the loops tight and close together to completely cover the plastic.
3. Create Patterns and Designs
When you want to change colors or create geometric patterns (like stripes or loom-style weaves), add a new thread by passing it over and under the main base. Have fun combining bright shades for a rainbow effect or pastel colors for a more romantic look!
4. Finish and Secure
Once the entire bracelet is covered and the pattern is complete, cut the thread, leaving a couple of centimeters. Secure the end firmly inside the bracelet with a hidden knot or a drop of clear fabric glue. Let it dry for a few minutes.
Creative Ideas to Customize Your Bracelets
The best part of this project is that the yarn-wrapped plastic base is a blank canvas ready for all your ideas! Don’t limit yourself to just thread—unleash your creativity by mixing different materials to create a style that is truly your own.
- With beads and sequins: Thread small glass, wooden, or metal beads directly onto the thread as you wrap the base, or sew them on afterward. Sequins will add brilliant pops of light that are perfect for summer nights.
- With fabric scraps and lace: If you have leftover fabric, old t-shirts to cut into strips, or lace ribbons, use them instead of (or alongside) the thread! Wrapping lace over colored yarn instantly adds a vintage or shabby chic touch.
- With charms and pendants: Add a small clasp or metal jump ring to attach lucky charms, drilled seashells, or handmade tassels that dangle as you move.
- Texture effect and knots: Experiment by alternating threads of different thicknesses—like combining the roughness of jute cord with the softness of wool—or create small knots (macramé style) along the surface for a super original 3D effect.
Why Choose Creative Upcycling?
Making accessories out of recycled materials isn’t just a fun and relaxing hobby—it’s also a meaningful step toward helping the environment.
The real highlight? The absolute uniqueness of what you make. Unlike mass-produced jewelry, every bracelet crafted with your own imagination becomes a one-of-a-kind piece that cannot be duplicated.
That is precisely why these bracelets make such a special and meaningful gift idea: giving a handmade item to someone you care about means giving them something unique, crafted specifically for them with your time and hands. It’s an affordable, sustainable gift with priceless emotional value!